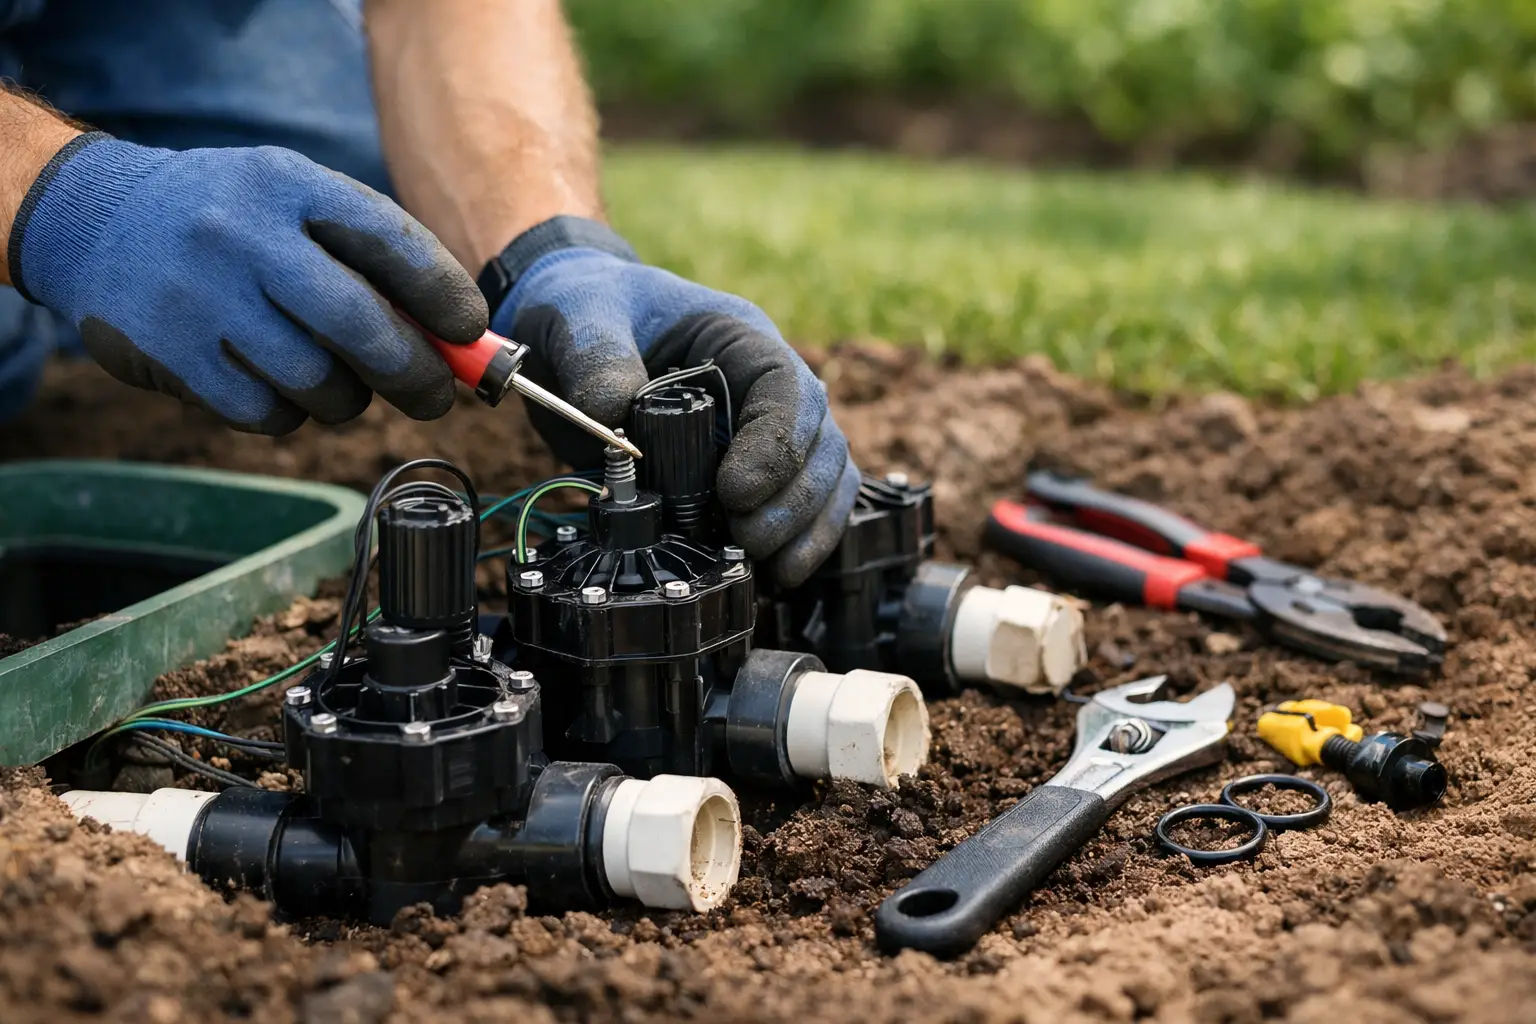
A sprinkler zone that will not turn off can waste a surprising amount of water in a single day. A zone that will not turn on can leave turf, beds, and trees stressed during Parker's dry growing season. Knowing how to repair sprinkler valve problems begins with identifying whether the issue is inside the valve, in the wiring, or elsewhere in the irrigation system.
Sprinkler valves are mechanical and electrical components. They rely on water pressure, a flexible diaphragm, a solenoid, and a controller signal all working together. A small amount of grit, a worn diaphragm, a damaged wire, or a cracked valve body can stop that process. The right repair protects both your landscape and your water use.
Start by Confirming the Valve Is the Problem
Before opening a valve, make sure the symptom points to the valve itself. If one zone does not run while every other zone operates normally, the valve, solenoid, or zone wiring is a likely cause. If multiple zones fail, look first at the controller, water supply, rain sensor, or a master valve if your system has one.
Locate the valve box for the affected zone. Residential valves are often grouped in a buried box near the water source, along a side yard, or near landscape beds. Clear soil, mulch, and standing water from the box so you can inspect the valve body and wiring without pulling on connections.
A valve that leaks continuously from the top, sides, or pipe fittings may have a cracked body, loose fitting, failed seal, or freeze-related damage. In Colorado, winter exposure can create problems that are not obvious until irrigation start-up. If water is pooling around the valve box, turn off the irrigation water supply before investigating further.
How to Repair Sprinkler Valve Issues Safely
Always shut off the irrigation supply before disassembling a valve. The shutoff is commonly located near the backflow assembly, basement irrigation connection, or another designated irrigation supply point. Then run the affected zone briefly from the controller, if possible, to relieve remaining pressure.
Take a clear photo of the valve, wiring, and fittings before removing parts. It is easy to lose track of which wire served which zone, especially when several valves share a manifold. Keep dirt out of the open valve and avoid forcing plastic components, which can become brittle with age and temperature changes.
The repair method depends on what the valve is doing.
When a Zone Will Not Shut Off
A zone that continues running after the controller stops it usually has a valve that is stuck open. The most common culprit is debris beneath the diaphragm. Sand, small rocks, deteriorated rubber, or mineral buildup can keep the diaphragm from sealing against its seat.
Remove the screws or retaining ring from the valve bonnet, depending on the model. Lift the bonnet carefully, noting the position of the spring and diaphragm. Rinse the diaphragm and the valve interior with clean water. Inspect the diaphragm for tears, stretched edges, cracks, or a distorted center section. A damaged diaphragm should be replaced with the correct part for that valve model.
Also inspect the small ports in the bonnet and diaphragm. These passages control pressure above the diaphragm. If one is clogged, the valve may stay open or operate inconsistently. Clean gently with water and a soft tool. Avoid enlarging the ports, which can affect valve operation.
Reassemble the valve with the diaphragm seated evenly and the screws tightened in a balanced pattern. Turn the water back on slowly, then test the zone from the controller. If water still flows after the zone stops, the valve seat may be worn or the valve body may need replacement.
When a Zone Will Not Turn On
A zone that does not activate may have a failed solenoid, wiring issue, blocked valve, or controller problem. Start with the manual bleed screw or solenoid, following the valve manufacturer's design. Opening it slightly should allow the valve to operate manually. If water flows when the valve is opened manually but not when the controller starts the zone, the problem is likely electrical.
Check that the wire connectors are secure, dry, and protected from corrosion. Low-voltage irrigation wires often fail at splices inside valve boxes because of moisture, shifting soil, or poor previous connections. A controller may show the zone running even when a broken wire prevents the solenoid from receiving the signal.
If the wiring appears sound, replace the solenoid with a compatible model. Solenoids can fail internally and may hum, become unusually hot, or fail to open the valve. Install the replacement without cross-threading it, reconnect the wires using waterproof connectors, and test the zone.
If the valve will not open manually, shut off the water and inspect the diaphragm, spring, and internal passages. Debris or a damaged diaphragm can keep the valve closed just as easily as it can keep it open.
When the Valve Leaks
Leaks at the top of the valve can come from a damaged bonnet seal, loose screws, or a cracked lid. A leak at a threaded connection may be caused by a fitting that has shifted, a failed threaded seal, or a cracked valve body. Leaks beneath the valve or along the manifold require a closer inspection because water can travel through soil and appear far from the actual break.
A cracked valve body is generally a replacement issue, not a repair to patch. Temporary sealants rarely hold under constant irrigation pressure and can make a proper repair more difficult later. The same is true for split PVC fittings near a valve manifold. Replacing the damaged component is the dependable approach.
Match the Part to the Existing Valve
Sprinkler valves are not interchangeable simply because they look similar. Valve size, inlet and outlet configuration, flow direction, thread type, solenoid compatibility, and diaphragm design all matter. Bringing home a nearly matching part can create a repair that leaks, restricts flow, or fails early.
Look for the brand and model information molded into the valve lid or body. If it is unreadable, document the valve dimensions, pipe configuration, and the existing internal parts before choosing a replacement. In older systems, a full valve replacement may be more practical than trying to locate a discontinued diaphragm or bonnet.
A replacement also becomes the better option when the valve has repeated failures, visible cracking, stripped screws, warped components, or a compromised manifold connection. Repairing only one worn part can make sense, but it depends on the condition of the complete assembly.
Protect the System After the Repair
Once the valve operates correctly, run the zone long enough to inspect the entire area. Confirm that each sprinkler head rises, rotates, and shuts off properly. A valve issue can draw attention to other concerns, such as clogged nozzles, damaged heads, low pressure, or a zone schedule that no longer suits the landscape.
Watch the valve box for several minutes after the zone stops. Water should not continue seeping from the valve, fittings, or surrounding soil. Return later in the day if the original problem was intermittent. Some electrical faults appear only after wires have warmed or after a controller runs through several zones.
Seasonal maintenance matters as much as the repair itself. A properly winterized system is less likely to experience freeze damage at valves and manifolds. At spring start-up, valves should be checked for leaks and reliable operation before hot weather places extra demand on turf and planting beds.
When to Bring in an Irrigation Specialist
Some valve repairs are straightforward, but recurring leaks, multiple nonworking zones, buried manifold damage, and uncertain electrical faults call for specialized diagnosis. A professional can test solenoids and wiring, locate hidden valve boxes, evaluate pressure, and verify that the repair supports efficient system performance rather than masking a larger issue.
For homeowners in Parker, Castle Rock, Highlands Ranch, Lone Tree, and Southeast Aurora, Irrivive Sprinklers provides focused repair and maintenance support for systems that need dependable operation through the season. The goal is not simply to get water flowing again. It is to restore controlled, efficient irrigation that supports the landscape you have invested in.
A sprinkler valve should open fully, close cleanly, and respond every time the controller calls for water. If yours does not, addressing it early helps prevent water waste, landscape stress, and a small valve problem from becoming a larger irrigation repair.